Metal Coil/Flats: Same Day Pick Up In Arizona

LOOKING FOR STANDING SEAM METAL ROOFING INSTALLATION VIDEOS?

WESTERN LOCK® STANDING SEAM METAL ROOFING

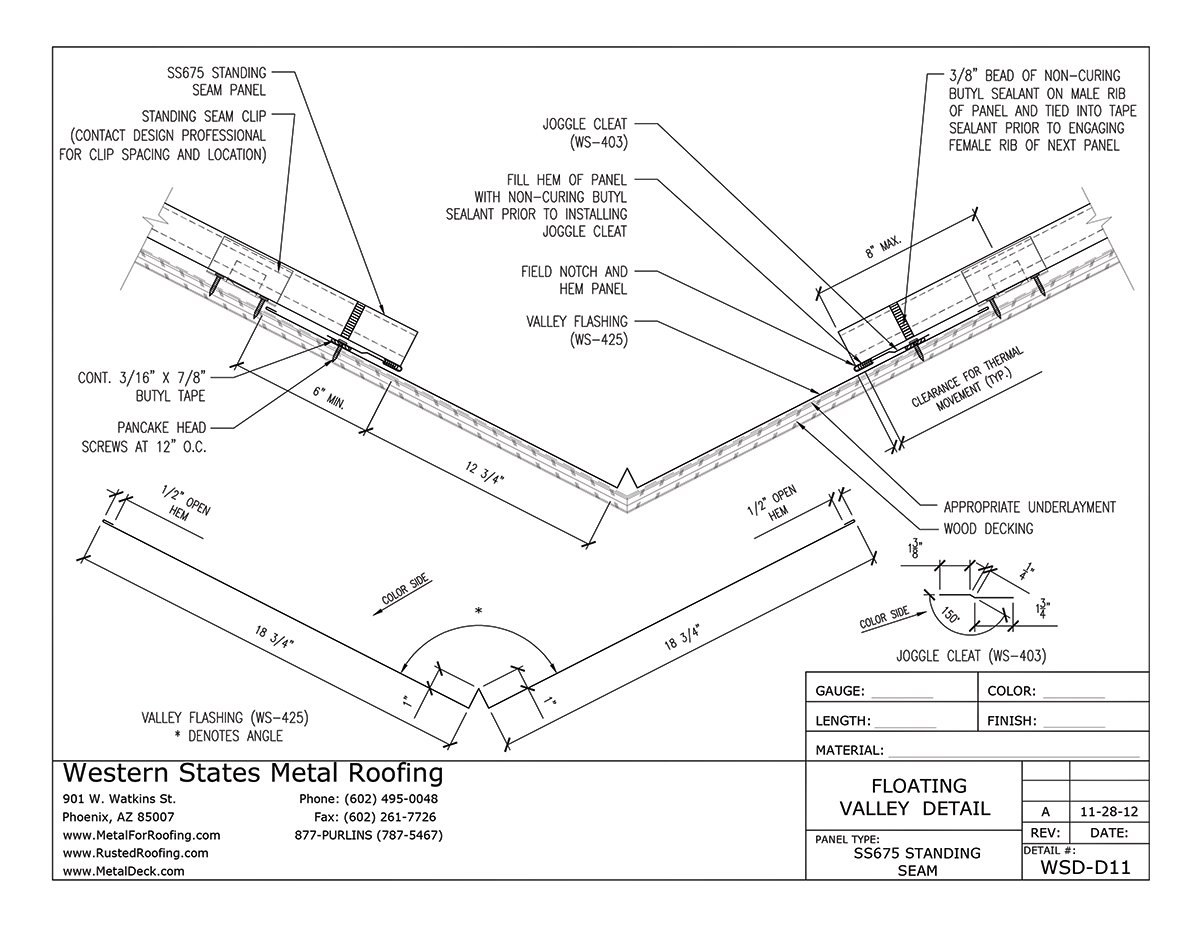
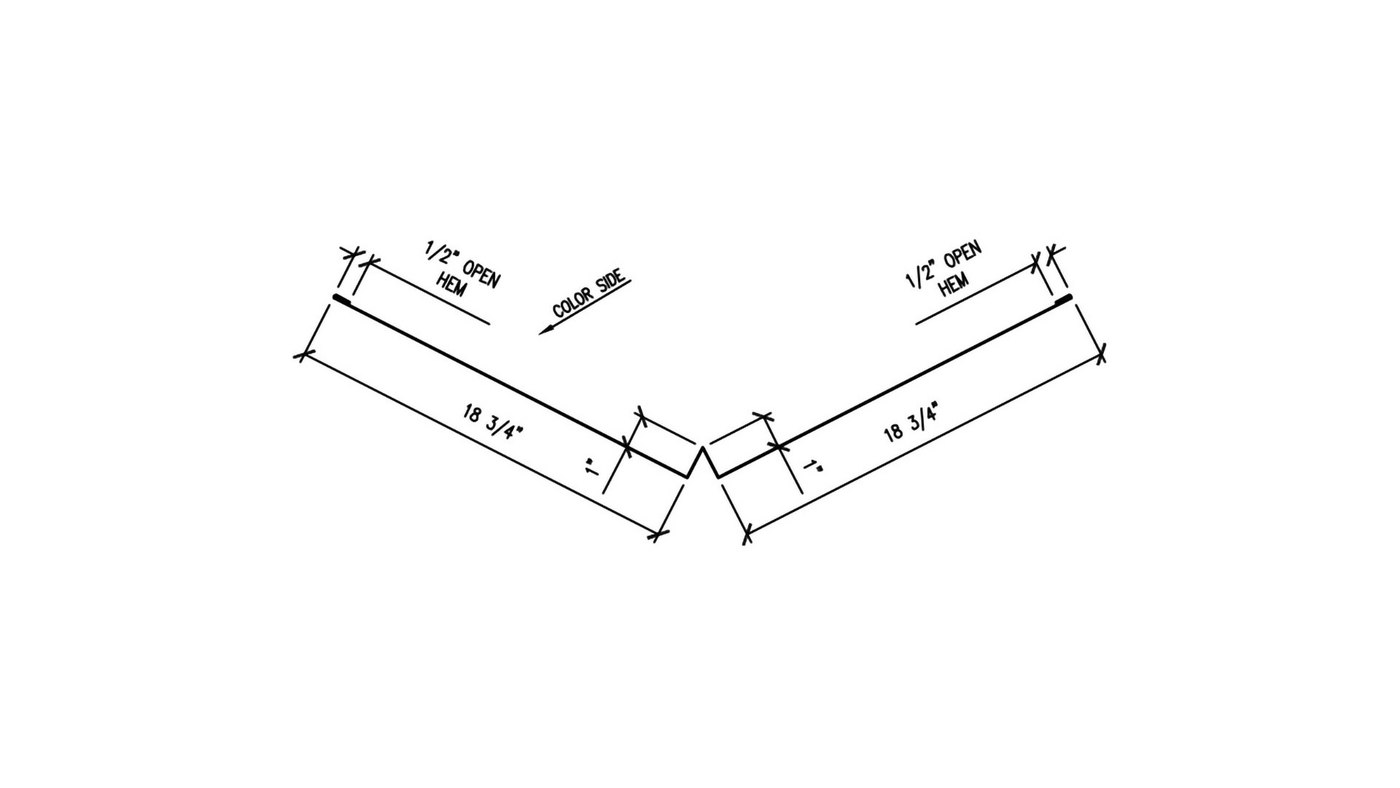
Floating Valley - Part #WS-425

Floating valley means that the standing seam panels aren't pinned in place at the valley. This allows for expansion and contraction. If you have a floating valley, you will need a fixed connection at the other end of the standing seam panel. 

This is the most popular valley detail that we supply

Valley trim is a raised section at the lowest point of the valley that's designed to keep water from moving up the opposite slope and penetrating the roof. Valley trim is installed prior to the installation of the metal roofing panels. The valley of a metal roof is an area created by two intersecting slopes.

WS-425 - FLOATING VALLEY - PARTS LIST

This parts list is designed to help you calculate the quantity of accessories that you’ll need for your trim installation. It has all of the accessories that are needed to install 1 full piece of trim, which is 120" long. To calculate the total number of accessories you will need for your job, simply take the number of trim pieces associated with the trim part purchased and multiply the list by that number for a total for your project.

Components List


  • 1 Piece Valley Flashing - WS-425
    Roof Pitch Required (Both Sides)
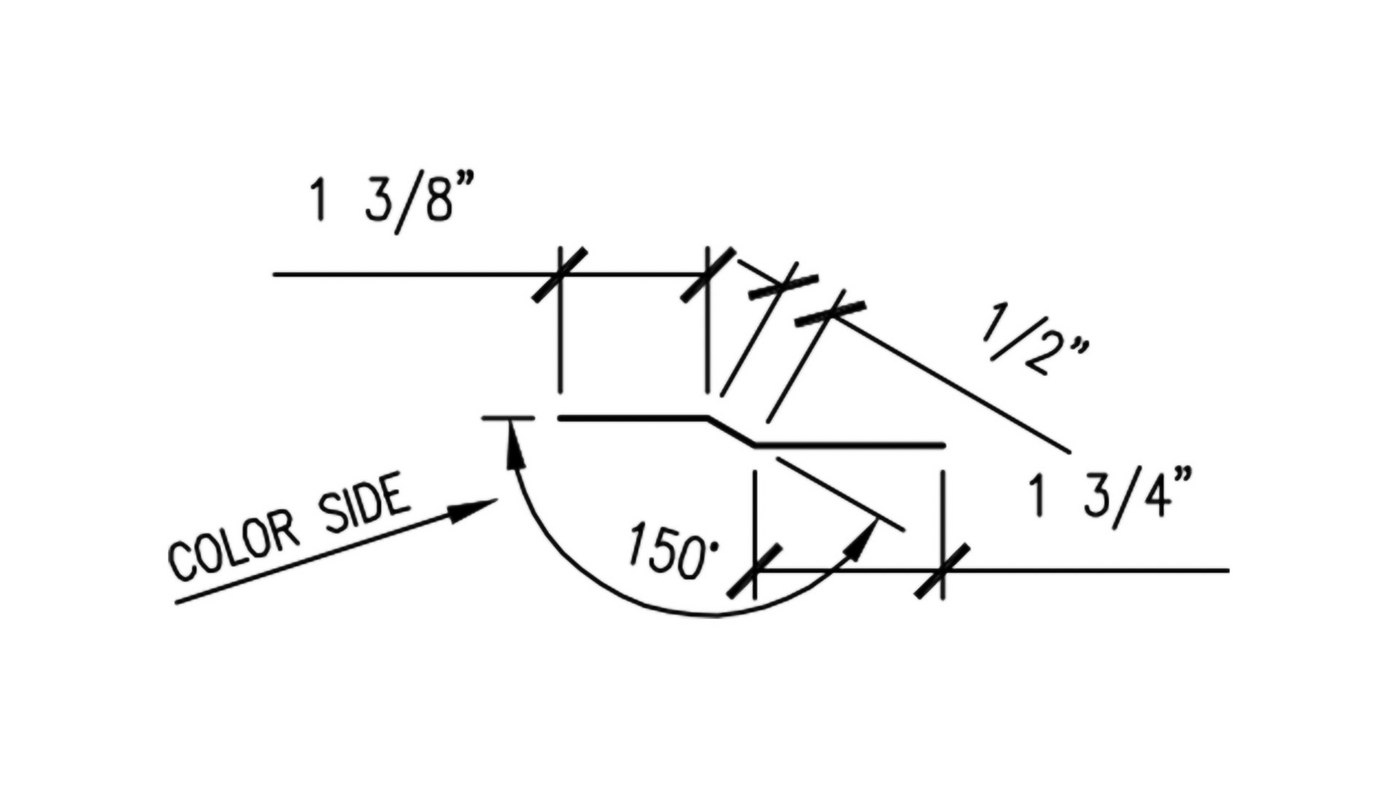
  • 2 Pieces Joggle Cleat - WS-403
  • 20 Pancake Head Screws (#10X1") NO Washer
    Verify Metal To Wood
  • 20 Linear Feet Of Double Sided Butyl Tape, 3/16" X 7/8"
  • 2 1/4 Tubes Butyl Sealant
  • 1/2 Tube Silicone Sealant
  • Additional 10 Linear Feet Of 48" Wide Sharkskin Ultra SA - Self Adhesive Roofing Underlayment
    We recommend an additional layer of underlayment at the valley condition. You will need the normal underlayment on the wood substrate plus an additional layer of underlayment at the valley

WSMR Recommends the use of a water barrier or underlayment prior to the installation of the trim components or metal roofing panels.

We recommend:


Standing Seam

Installation Videos

Image

Valley Flashing Installation - Part 1. Panel Layout And Cutting The Valley

Step by step instructions that show how to cut the valley trim, finish the valley flashing, and standing seam roofing panel layout at the valleys.

Watch Now

Image

Valley Flashing Installation - Part 2. How To Install The Standing Seam Panels For A Floating Valley

Step by step instructions for a floating valley flashing. Includes cutting the standing seam panels and attaching to the joggle cleat.

Watch Now

Just in case you forgot

ADDITIONAL ITEMS YOU MAY NEED...