Installation Of Rubber Pipe Boots On Metal Roof: Pipe Flashing Install
If a leak occurs through the roof, the first place to look should always be around protrusions through the roof - like pipes and chimneys. These are usually the locations of roof leaks. That’s why it’s important to know how to properly and securely install a rubber pipe boot to ensure the roof is being kept watertight.
Here you will find all the steps you need to follow to ensure an accurate and tight pipe flashing installation every time. At Western States Metal Roofing, we have been answering our customer’s metal roofing questions for over 25 years. So, just to make things easier we made you a pipe flashing installation video also.
This installation guide is designed for rubber pipe boot installation of an exposed fastener panel.
How Much Does Pipe Flashing Cost?
The cost of pipe flashing will depend upon the size and type of rubber boot. The smaller sizes will cost $8 to $16 each and the larger sizes can cost up to $32 each. Retrofit pipe flashing will cost more than a standard round or square pipe flashing. These range from $25 to $100 each.
What Tools And Supplies Are Required To Install Pipe Flashing On A Metal Roof
- A carpenter’s pencil
- Roofing gloves
- A caulking gun
- Silicone sealant
- A drill
- A step drill bit or reciprocating saw
- ¼ x ⅞ inch metal to metal lap screws with sealant washer
How To Install Pipe Flashing For A Metal Roof With An Exposed Fastener Panel
- Measure location of your pipe to determine where to cut the roofing panel.
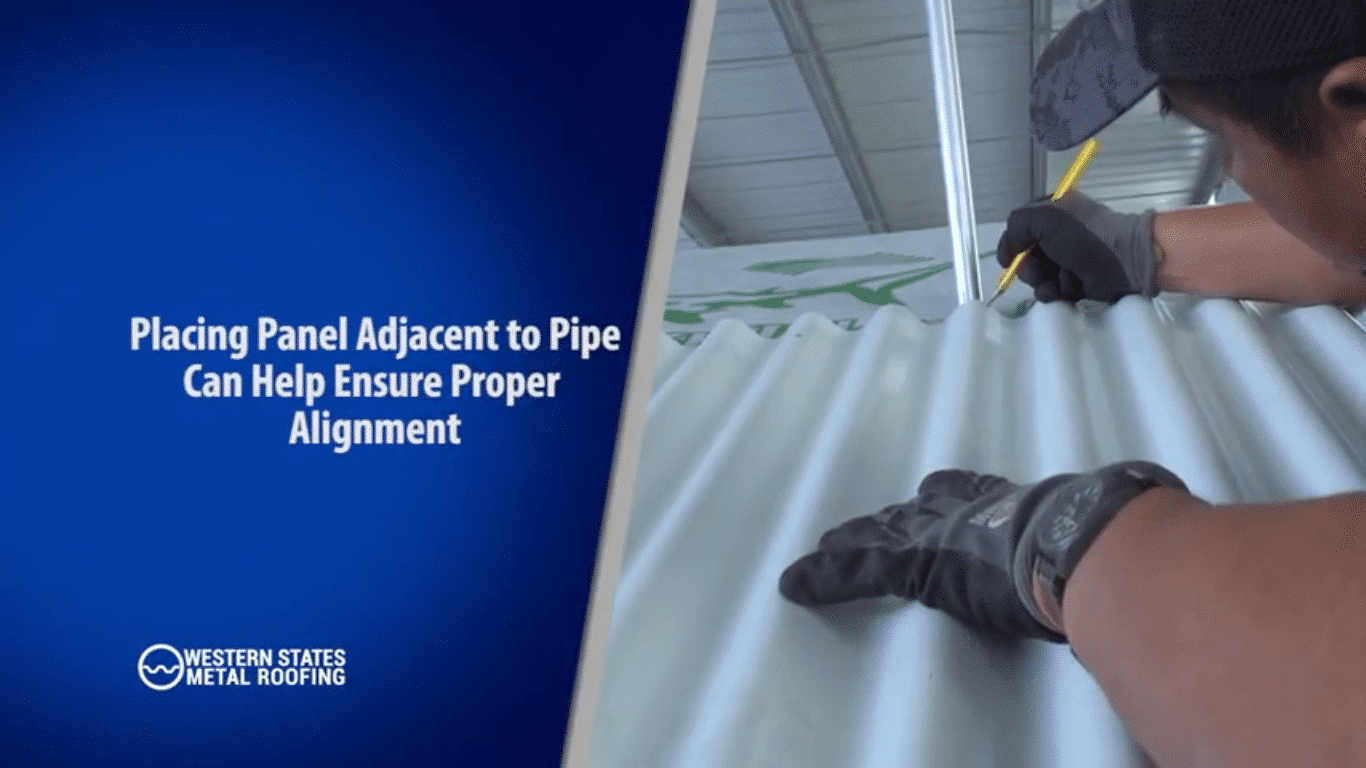
- Place the panel adjacent to the pipe to determine which rib the pipe will penetrate.
- Place panel on pair of sawhorse legs and mark panel based on measurements.
- Start by making a pilot hole.
- Use the step drill bit or reciprocating saw. Drill metal roofing panel until reached desired diameter
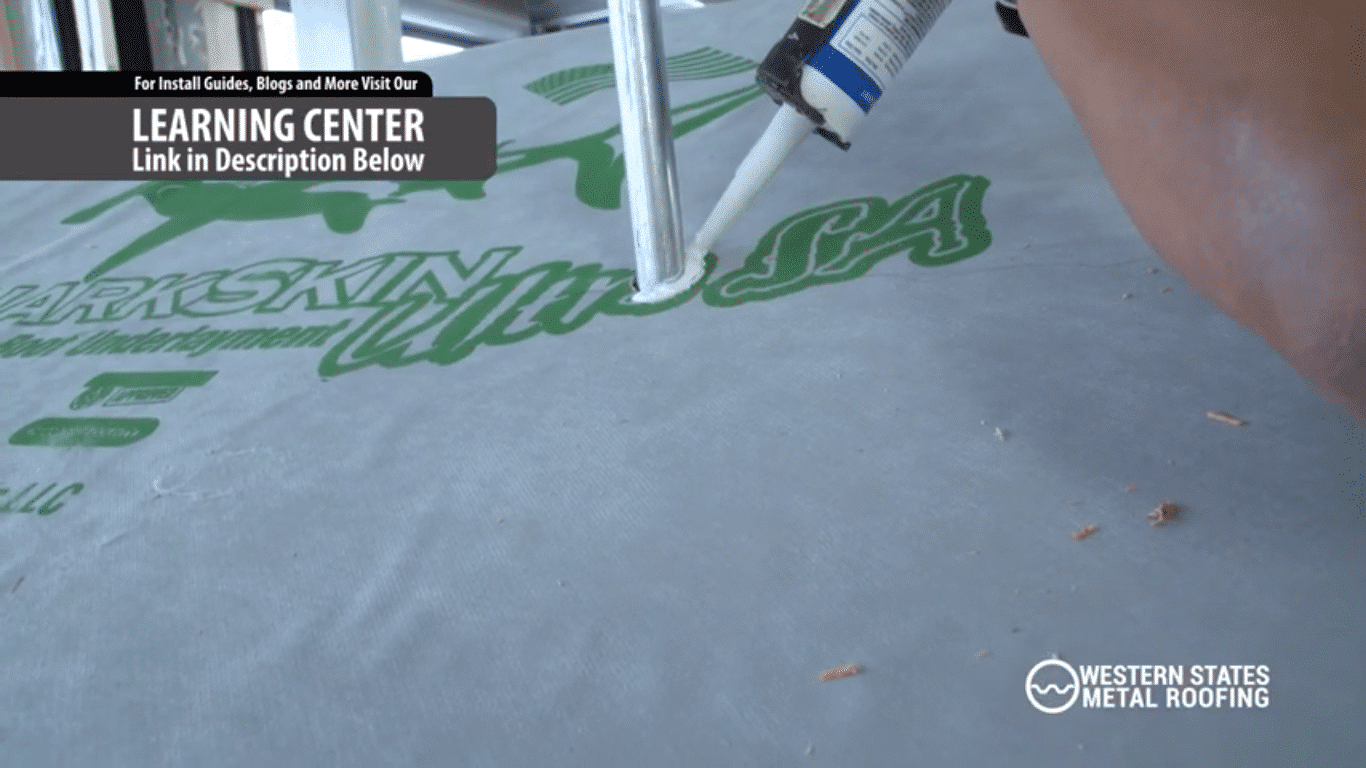
- Apply silicone sealant around the pipe.
- Place the roofing panel by aligning your drilled hole with the pipe
- Install metal roofing panel
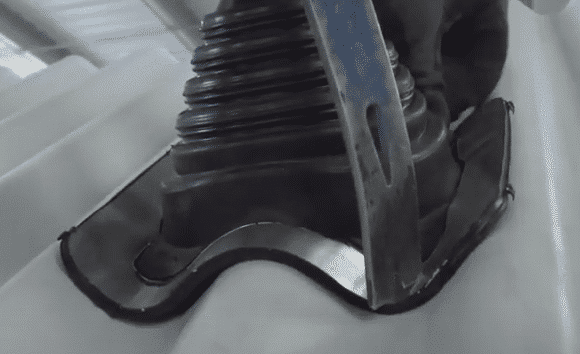
- Firmly mold pipe flashing to roofing panel by firmly pressing downwards
- Using your carpenter’s pencil, outline the pipe flashing on the roof panel.
- Apply silicone sealant on the roofing panel around the pipe penetration.
- Apply silicone sealant on the panel a half inch from the inner outline of your trace.
- Push your pipe flashing firmly into place.
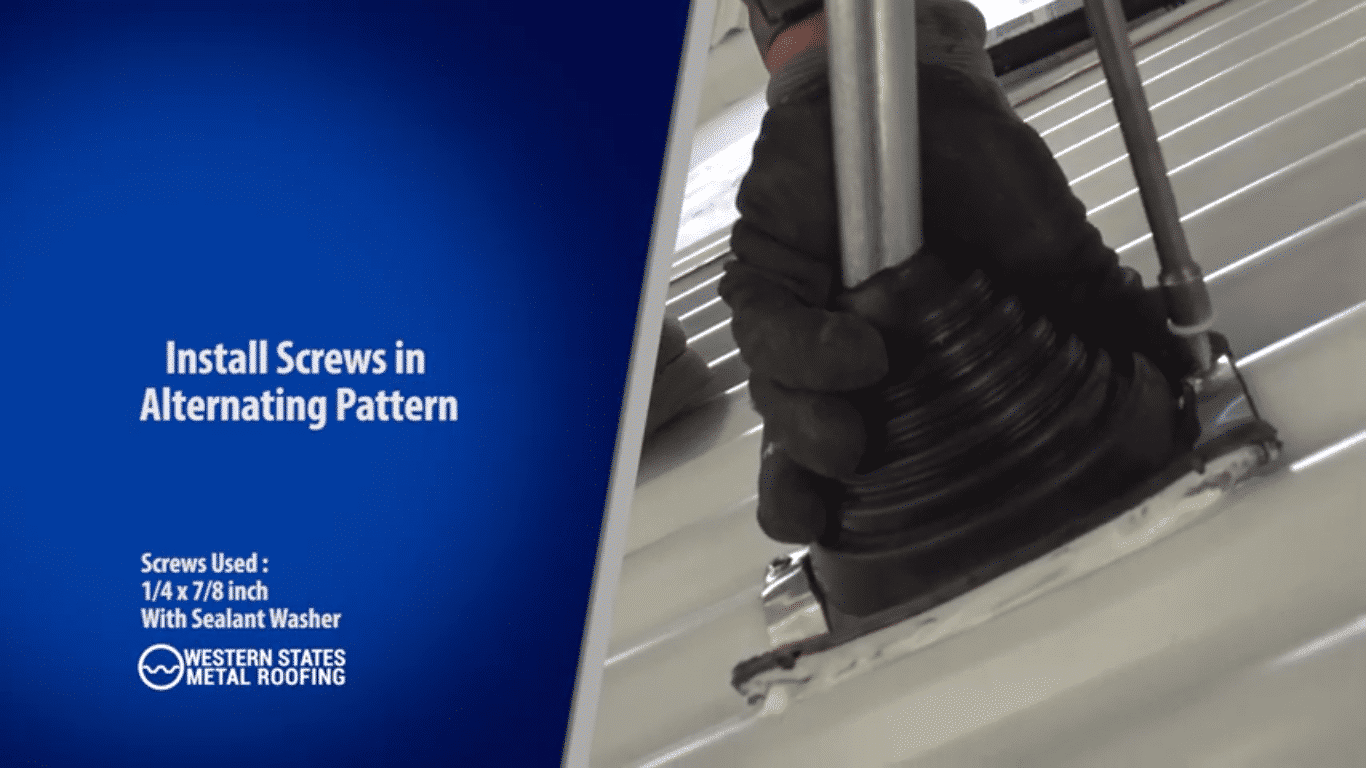
- Start with the high seam and install one ¼ x ⅞ inch metal to metal screw.
- Install a second screw on the high seam at the opposite end of your first screw.
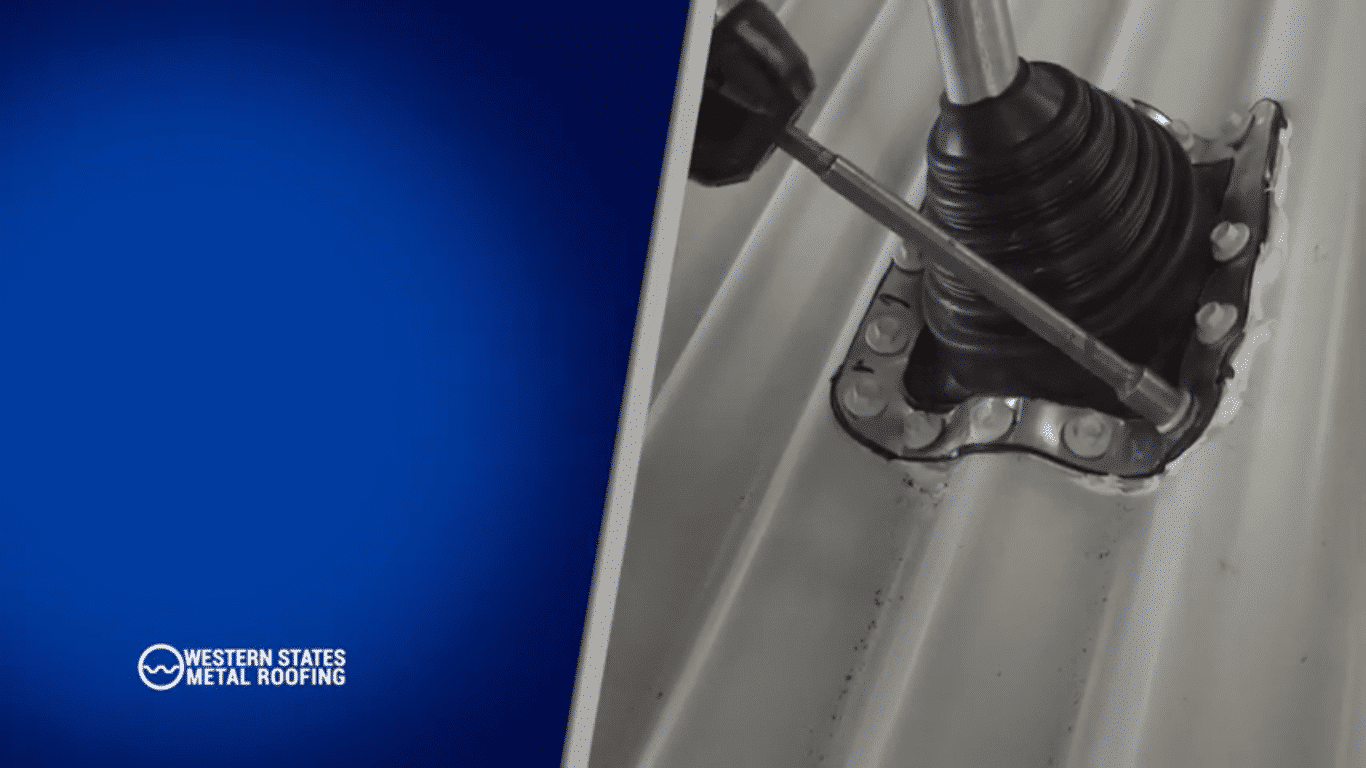
- Install remaining screws one inch on center around the perimeter of the pipe flashing.
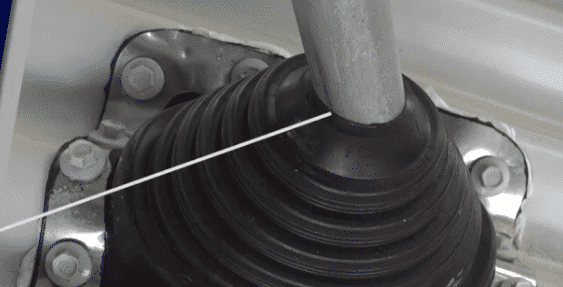
- Caulking can be placed at the pipe seal.
You don’t want to over-cut the hole size of your pipe flashing. A tight fit around the pipe is required to prevent leaks.
Types Of Pipe Flashing For An Exposed Fastener Panel
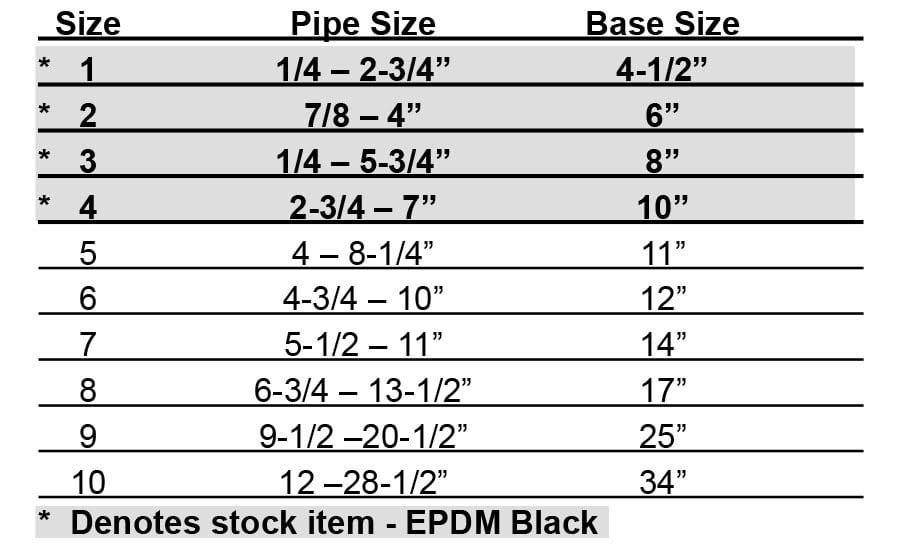
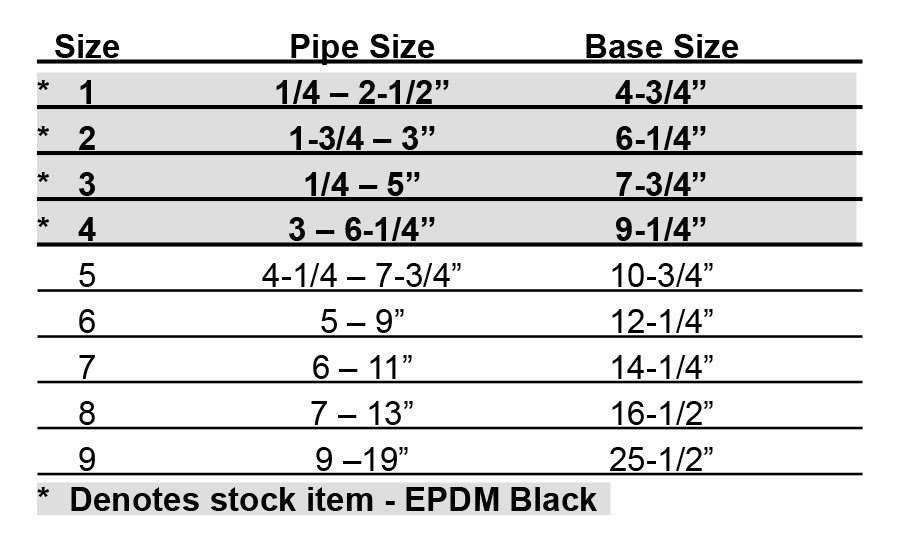
Rubber pipe boots are available with a square base, round base, or retrofit with round base and zipper. Pipe flashings come in various sizes that are easily adjustable and can be cut on the jobsite.
What Are The Sizes Of Square Pipe Flashing For A Metal Roof?
What Are The Sizes Of Round Pipe Flashing For A Metal Roof?
When your pipe boot is properly installed, your roof will be safe and secure for any kind of wind or weather it may endure.
Now that you can install like a pro, it’s time to purchase your metal roofing panels like one as well. Buy factory direct from Western States Metal Roofing and you could save 15%-50% by cutting out the middleman. Go to Western States Metal Roofing to see our catalog.
Looking for more installation help? We have you covered there, too. Go to our Learning Center today for more installation directions and help.
About Paul Rubio
Paul Rubio is the Vice President and one of the owners of Western States Metal Roofing. He has been in the metal roofing industry for 25 years. WSMR is a manufacturer of metal roofing, wall panels, and metal siding. We have colors and finishes that nobody else has with nearly 100 different colors in stock. Our selection of color options and finishes is likely the largest in the industry.


